So I completely intended on beefing up project one but it looks like it won't make by the end of the term. All the work is done but the rendering is still 3 or 4 days out. Here's the story:
I decided I wanted to fix up the following items:
1) Better lighting using HDRi light probe - I went out took panorama shots of my shooting location on a similarly bright day and stitched them together using Autodesk Stitcher Unlimited (free 15 day trial - kinda cool interface - dual platform - crashes a bit ) (There are many other options for this task)

Artistic disclaimer: I wasn't real specific with what I shot and I only needed vaguely correct lighting, not a perfect panorama since it's not viewed directly. Also, I didn't collect different shots of the same thing with different exposures for creating HDR info. You can do this but its time consuming and for my purposes not necessary. Content wise ,there was enough 'correct' info in it to give convincing interesting looking reflections and besides that I like this way so there.
I then created a 'light probe' which is like a spherical projection (But 360 degrees instead of 180?) A lit probe is an angular map type graphic. (like taking a picture of a globe and using it as a flat map of the earth except you get both sides)
 This was created with HDRshop (free but windows only) just as a LDR light point (no HDR info) but Blender was just happy with that. Note, the resolution on these things doesn't have to be high at all, I made mine much higher than necessary because I thought it was interesting looking. The one piece of missing info from the guides is the source panorama is called a lattitude longitude map and you do a conversion from that to angular map/light probe. You don't need HDR type graphic to make this conversion.
Very nice and pretty. These will do the lighting for me and create accurate believable reflections too. The trade off is rendering in Blender takes forever. I've had 4 computers at this for 5 days and I'm still only 40% of the way there. When the lab machines clear up after finals I should make a bit more progress. [Edit] It's Friday and my lab codes have already expired. I've probably already lost any progress they made as they get wiped this weekend. So make that 20% done.
More info + guides here:
http://en.wikibooks.org/wiki/Blender_3D:_Noob_to_Pro/HDRi
http://www.google.com/translate?u=http%3A%2F%2Fblenderclan.tuxfamily.org%2Fhtml%2Fmodules%2Fcontent%2F%3Fid%3D12&langpair=fr|en&hl=en&ie=UTF8
http://blenderartists.org/forum/showthread.php?t=172030
http://wiki.blender.org/index.php/Doc:Manual/Lighting/Ambient_Occlusion#Ambient_Colour
http://debevec.org/Probes/
Yafray: http://en.wikibooks.org/wiki/Blender_3D:_Noob_to_Pro/Yafray_Render_Options
old regular lighting:
 new HDRi lighting:
2) Slight color correction of original video to make it less grey (done)
3) a shadow under the car (easy enough)
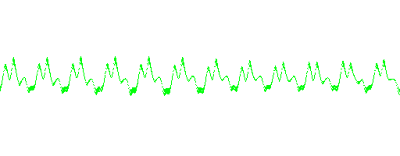
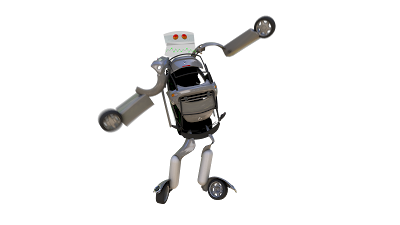
4) An oscilloscope instead of animated lips for the transformer. Besides looking way cool it helps cue in who's talking at any given moment since the dubbed voices make it seem like bad anime. (Like there's good anime?) I used processing to create the frames and saved them out in 1/24 second intervals. I used another processing sketch I wrote to replace all black pixels with alpha 0 pixels. This image sequence gets fed into Blender as a texture and with some careful math everything lines up nicely. I can't wait to see this all put together. I'll post the processing code at the end of this post.


5) Last but not least is a little better sync on the match motion. This will be done rotoscope style in after effects. I have started this the old data but realized just in case I should wait till I have the new stuff so I'm not wasting time. This is the only step not yet done (besides waiting for rendering) ----Oh, and I originally used a program called PFHoe for match moving. It's by the pixel farm (they make PFTrack: (-Cloverfield-) ) It's waaaaaaaaaaaaaaay faster (and more stable) than Isadora. Does cost money though to use it officially. In any case they have an excellent tutorial that anyone interested in match moving should check out regardless of what program they use as it explains simply a lot of the concepts involved in match moving. (focal length importance: lense distorition, parallax---and it's under 10 min so you don't get bored)
SO there you have it. Project 1 Almost redone but not quite. I spent a bit of time on this that I should have really spent on project 2 which kinda sucks because it's the end of term I still don't have anything done to show for it, but anywayses, when It's finished I'll post it here for archive completeness.
That's it for official blog entries. Everything from now on will be Bonus ramblings! Thanks to everyone, I enjoyed and appreciated this class very much, the buiding projection show was amazing - great work everybody.
-=-===--=-=-=-=-=-=-=-=-=-
STOP READING HERE
=-=-=-=-=-=-=-=-=-=-=-=-=-
Processing code mentioned above (cut and paste should work - params in code will need to be set)
1) ------------Oscilloscope image sequence from audio file:--------------
//used to create osciliscope movie of sound
//note: You must manually close the window when done to stop recording frames

//import ddf.minim.signals.*;
import ddf.minim.*;
//import ddf.minim.analysis.*;
//import ddf.minim.effects.*;


//originally sound file was just the built in mic but modified to open a sound file

Minim minim;
//AudioInput in;
AudioPlayer in;

void setup()
{
size(512, 200, P3D);
frameRate(24); //make it film friendly 24fps

minim = new Minim(this);
minim.debugOn();

// get a line in from Minim, default bit depth is 16
//in = minim.getLineIn(Minim.STEREO, 512);//use built in mic

in = minim.loadFile("Submix1.wav"); //wav or mp3 (no aiff)
delay(1000); //just to make sure the processors caught up (prolly not neccesarry)
in.play();

}

void draw()
{
background(0);//black backgrond
stroke(3,255,12);//mostly green line

// draw the waveforms
for(int i = 0; i <>

2) --------------Replace black pixels with alpha channel---------------


//Batch processes a set of images (png)...
//...replacing any black pixels with an alpha background
//(note: currently 9999 image limit - easy to raise to whatever you want)
//Clay Kent 2010 based on code from http://processing.org/discourse/yabb2/YaBB.pl?num=1194820706/4


//import processing.opengl.*;
PGraphics alphaImage;
int startFrame = 1; //set this..
int endFrame = 3123;//.. this..
String fileNamePrefix = "frame-" ; //.. and this (example for "frame-1234.png or frame-0001.png"
String fileTypeSuffix = ".png" ;
//note this is setup for png but anything I think tiffs are supported too (jpgs work as well but contain no alpha info)

PImage img;
int currentFrame;

void setup()
{
size(512, 200); //..oh yeah and this - frame size goes here
colorMode(HSB,255);
currentFrame=startFrame-1;

}

void draw()
{
currentFrame++;
if(currentFrame>=endFrame)
{
println("done");
exit();
}


image(loadImage(fileNamePrefix+ nf(currentFrame,4) +fileTypeSuffix), 0, 0, width, height);
alphaImage = createGraphics(width, height, P2D);//frame size could be set here too (including shrinking expanding etc)
alphaImage.beginDraw();


loadPixels();
alphaImage.loadPixels();
float h,s,b;
for (int i=0; i0) alphaImage.pixels[i]=color(h,s,b,255);
else alphaImage.pixels[i]=color(h,s,b,0);
// re-use the brightness value as the alpha --
// (since the pixel array, strictly speaking,
// does not contain alpha values (whoops.)
// in this example, if the brightness is 0,
// use 0 alpha, otherwise use full alpha.
}
alphaImage.updatePixels();
alphaImage.endDraw();

println(fileNamePrefix+"_alpha"+ nf(currentFrame,4) +fileTypeSuffix);
alphaImage.save(fileNamePrefix+"_alpha"+ nf(currentFrame,4) +fileTypeSuffix); //tweek name to suit


}


3) ---------------Create Movie from image sequence (so you don't have to do it in Ae, FCP, QT-Pro etc) note - no alpha channel support--------------


//Batch processes a set of images (png)...
//...creating a quicktime movie file in with the animation codec
//place source files in this folder (where the .pde file is) and set the vars below, then run
//(note: currently 9999 image limit - easy to raise to whatever you want)
//Clay Kent 2010


import processing.video.*;
MovieMaker mm;
//import processing.opengl.*; //note OPENGL seems to crash this??
int startFrame = 1; //set this..
int endFrame = 200;//.. this..
String fileNamePrefix = "" ; //.. and this (example for "frame-1234.png or frame-0001.png"
String fileTypeSuffix = ".png" ;
//note this is setup for png but .jpg is supported and possibly .tiff

PImage img;
int currentFrame;

void setup()
{
size(800, 600); //..oh yeah and this - frame size goes here //don't use OPENGL- weird bug

currentFrame=startFrame;
// mm = new MovieMaker(this, width, height, "drawing.mov");
mm = new MovieMaker(this, width, height, "imageSequencedMovie.mov", 24,  MovieMaker.ANIMATION, MovieMaker.HIGH,24);

}

void draw()
{

if(currentFrame>=endFrame)
{
println("done");
mm.finish();
exit();
}

background(0);
image(loadImage(fileNamePrefix+ nf(currentFrame,4) +fileTypeSuffix), 0, 0, width, height);
println(fileNamePrefix+ nf(currentFrame,4) +fileTypeSuffix);
//saveFrame(fileNamePrefix+ nf(currentFrame,4) +"_alpha"+fileTypeSuffix); //tweek name to suit //("frame-####.png");
mm.addFrame();
currentFrame++;

}


