Friday, June 11, 2010

Project 1 revisited (almost)

This is too late to be useful but it's still interesting so here it is:

So I completely intended on beefing up project one but it looks like it won't make by the end of the term. All the work is done but the rendering is still 3 or 4 days out. Here's the story:

I decided I wanted to fix up the following items:

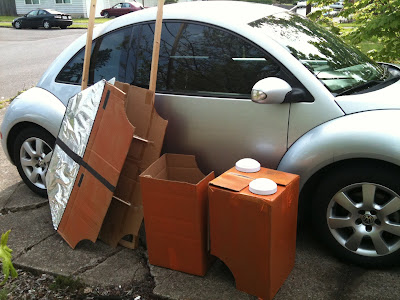
1) Better lighting using HDRi light probe - I went out took panorama shots of my shooting location on a similarly bright day and stitched them together using Autodesk Stitcher Unlimited (free 15 day trial - kinda cool interface - dual platform - crashes a bit ) (There are many other options for this task)


Artistic disclaimer: I wasn't real specific with what I shot and I only needed vaguely correct lighting, not a perfect panorama since it's not viewed directly. Also, I didn't collect different shots of the same thing with different exposures for creating HDR info. You can do this but its time consuming and for my purposes not necessary. Content wise ,there was enough 'correct' info in it to give convincing interesting looking reflections and besides that I like this way so there.


I then created a 'light probe' which is like a spherical projection (But 360 degrees instead of 180?) A lit probe is an angular map type graphic. (like taking a picture of a globe and using it as a flat map of the earth except you get both sides)

This was created with HDRshop (free but windows only) just as a LDR light point (no HDR info) but Blender was just happy with that. Note, the resolution on these things doesn't have to be high at all, I made mine much higher than necessary because I thought it was interesting looking. The one piece of missing info from the guides is the source panorama is called a lattitude longitude map and you do a conversion from that to angular map/light probe. You don't need HDR type graphic to make this conversion.

Very nice and pretty. These will do the lighting for me and create accurate believable reflections too. The trade off is rendering in Blender takes forever. I've had 4 computers at this for 5 days and I'm still only 40% of the way there. When the lab machines clear up after finals I should make a bit more progress. [Edit] It's Friday and my lab codes have already expired. I've probably already lost any progress they made as they get wiped this weekend. So make that 20% done.


More info + guides here:

http://en.wikibooks.org/wiki/Blender_3D:_Noob_to_Pro/HDRi
http://www.google.com/translate?u=http%3A%2F%2Fblenderclan.tuxfamily.org%2Fhtml%2Fmodules%2Fcontent%2F%3Fid%3D12&langpair=fr|en&hl=en&ie=UTF8
http://blenderartists.org/forum/showthread.php?t=172030
http://wiki.blender.org/index.php/Doc:Manual/Lighting/Ambient_Occlusion#Ambient_Colour
http://debevec.org/Probes/
Yafray: http://en.wikibooks.org/wiki/Blender_3D:_Noob_to_Pro/Yafray_Render_Options

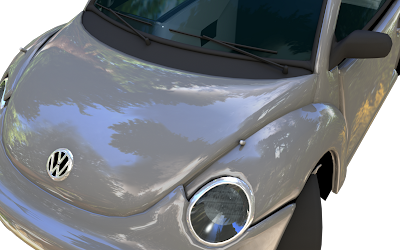
old regular lighting:
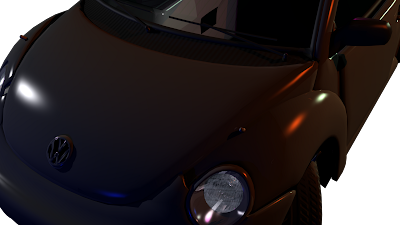
new HDRi lighting:


2) Slight color correction of original video to make it less grey (done)

3) a shadow under the car (easy enough)

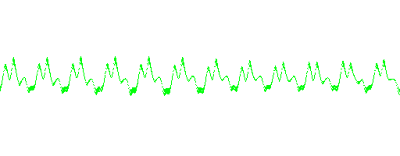
4) An oscilloscope instead of animated lips for the transformer. Besides looking way cool it helps cue in who's talking at any given moment since the dubbed voices make it seem like bad anime. (Like there's good anime?) I used processing to create the frames and saved them out in 1/24 second intervals. I used another processing sketch I wrote to replace all black pixels with alpha 0 pixels. This image sequence gets fed into Blender as a texture and with some careful math everything lines up nicely. I can't wait to see this all put together. I'll post the processing code at the end of this post.
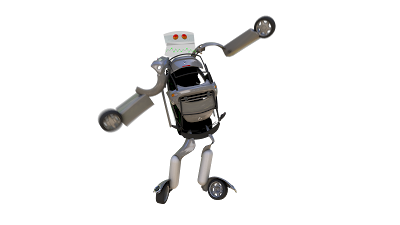


5) Last but not least is a little better sync on the match motion. This will be done rotoscope style in after effects. I have started this the old data but realized just in case I should wait till I have the new stuff so I'm not wasting time. This is the only step not yet done (besides waiting for rendering) ----Oh, and I originally used a program called PFHoe for match moving. It's by the pixel farm (they make PFTrack: (-Cloverfield-) ) It's waaaaaaaaaaaaaaay faster (and more stable) than Isadora. Does cost money though to use it officially. In any case they have an excellent tutorial that anyone interested in match moving should check out regardless of what program they use as it explains simply a lot of the concepts involved in match moving. (focal length importance: lense distorition, parallax---and it's under 10 min so you don't get bored)

SO there you have it. Project 1 Almost redone but not quite. I spent a bit of time on this that I should have really spent on project 2 which kinda sucks because it's the end of term I still don't have anything done to show for it, but anywayses, when It's finished I'll post it here for archive completeness.

That's it for official blog entries. Everything from now on will be Bonus ramblings! Thanks to everyone, I enjoyed and appreciated this class very much, the buiding projection show was amazing - great work everybody.

-=-===--=-=-=-=-=-=-=-=-=-
STOP READING HERE
=-=-=-=-=-=-=-=-=-=-=-=-=-

Processing code mentioned above (cut and paste should work - params in code will need to be set)
1) ------------Oscilloscope image sequence from audio file:--------------


//used to create osciliscope movie of sound
//note: You must manually close the window when done to stop recording frames

//import ddf.minim.signals.*;
import ddf.minim.*;
//import ddf.minim.analysis.*;
//import ddf.minim.effects.*;


//originally sound file was just the built in mic but modified to open a sound file

Minim minim;
//AudioInput in;
AudioPlayer in;

void setup()
{
size(512, 200, P3D);
frameRate(24); //make it film friendly 24fps

minim = new Minim(this);
minim.debugOn();

// get a line in from Minim, default bit depth is 16
//in = minim.getLineIn(Minim.STEREO, 512);//use built in mic

in = minim.loadFile("Submix1.wav"); //wav or mp3 (no aiff)
delay(1000); //just to make sure the processors caught up (prolly not neccesarry)
in.play();

}

void draw()
{
background(0);//black backgrond
stroke(3,255,12);//mostly green line

// draw the waveforms
for(int i = 0; i <>

2) --------------Replace black pixels with alpha channel---------------


//Batch processes a set of images (png)...
//...replacing any black pixels with an alpha background
//(note: currently 9999 image limit - easy to raise to whatever you want)
//Clay Kent 2010 based on code from http://processing.org/discourse/yabb2/YaBB.pl?num=1194820706/4


//import processing.opengl.*;
PGraphics alphaImage;
int startFrame = 1; //set this..
int endFrame = 3123;//.. this..
String fileNamePrefix = "frame-" ; //.. and this (example for "frame-1234.png or frame-0001.png"
String fileTypeSuffix = ".png" ;
//note this is setup for png but anything I think tiffs are supported too (jpgs work as well but contain no alpha info)

PImage img;
int currentFrame;

void setup()
{
size(512, 200); //..oh yeah and this - frame size goes here
colorMode(HSB,255);
currentFrame=startFrame-1;

}

void draw()
{
currentFrame++;
if(currentFrame>=endFrame)
{
println("done");
exit();
}


image(loadImage(fileNamePrefix+ nf(currentFrame,4) +fileTypeSuffix), 0, 0, width, height);
alphaImage = createGraphics(width, height, P2D);//frame size could be set here too (including shrinking expanding etc)
alphaImage.beginDraw();


loadPixels();
alphaImage.loadPixels();
float h,s,b;
for (int i=0; i0) alphaImage.pixels[i]=color(h,s,b,255);
else alphaImage.pixels[i]=color(h,s,b,0);
// re-use the brightness value as the alpha --
// (since the pixel array, strictly speaking,
// does not contain alpha values (whoops.)
// in this example, if the brightness is 0,
// use 0 alpha, otherwise use full alpha.
}
alphaImage.updatePixels();
alphaImage.endDraw();

println(fileNamePrefix+"_alpha"+ nf(currentFrame,4) +fileTypeSuffix);
alphaImage.save(fileNamePrefix+"_alpha"+ nf(currentFrame,4) +fileTypeSuffix); //tweek name to suit


}


3) ---------------Create Movie from image sequence (so you don't have to do it in Ae, FCP, QT-Pro etc) note - no alpha channel support--------------


//Batch processes a set of images (png)...
//...creating a quicktime movie file in with the animation codec
//place source files in this folder (where the .pde file is) and set the vars below, then run
//(note: currently 9999 image limit - easy to raise to whatever you want)
//Clay Kent 2010


import processing.video.*;
MovieMaker mm;
//import processing.opengl.*; //note OPENGL seems to crash this??
int startFrame = 1; //set this..
int endFrame = 200;//.. this..
String fileNamePrefix = "" ; //.. and this (example for "frame-1234.png or frame-0001.png"
String fileTypeSuffix = ".png" ;
//note this is setup for png but .jpg is supported and possibly .tiff

PImage img;
int currentFrame;

void setup()
{
size(800, 600); //..oh yeah and this - frame size goes here //don't use OPENGL- weird bug

currentFrame=startFrame;
// mm = new MovieMaker(this, width, height, "drawing.mov");
mm = new MovieMaker(this, width, height, "imageSequencedMovie.mov", 24, MovieMaker.ANIMATION, MovieMaker.HIGH,24);

}

void draw()
{

if(currentFrame>=endFrame)
{
println("done");
mm.finish();
exit();
}

background(0);
image(loadImage(fileNamePrefix+ nf(currentFrame,4) +fileTypeSuffix), 0, 0, width, height);
println(fileNamePrefix+ nf(currentFrame,4) +fileTypeSuffix);
//saveFrame(fileNamePrefix+ nf(currentFrame,4) +"_alpha"+fileTypeSuffix); //tweek name to suit //("frame-####.png");
mm.addFrame();
currentFrame++;

}


Thursday, June 10, 2010

Project 2: done

The computers rendering out the H264 and I'm all done in time for a good nights sleep before tomorrrrrr..............&&^%#$. Oh well, time for a nap. That devine inspiration I was waiting for never came, instead you're all getting Elvis......... I did use that audio to IPO curve script thing though. That part worked out all right.

Building Projection from Clay Kent on Vimeo.


Anyways......Heres some 'making of' shots:


Thursday, May 27, 2010

Project 2 Update

I haven't posted in forever so here is an update of various things 3D

For the building projection project 2, I'm looking into a program called VVVV It's windows only but it looks like it was important in most of the 3d building projection videos you see on you tube. It uses 'nodal' programing like Max or PD or Isadora and it can deal with 3D meshes effects/texturing/whatever in real time

This page describes the process of creating building projections.

It's getting a little late to take on any new technology so I'll have to see if this software is friendly enough to use before I commit to it for my project. In any case, the first step appears to be creating a 3D model of the surface being projected on. So I corrected my cell phone pic (pillow/pincusion distortion and source angle) of Villard to be more accurate and I am now starting to create that in blender. Feel free to use this, I have no idea if it's any better /worse than the official pic but I wanted to try it.

So now it's off to Blender to create the 3D version of this. Unless anyone has already done this? Anyone? Anyone? I'd be willing to trade collaborate something programming or engineerings wise? Yes, I'm lazy, I wish I had the attention span for extremely detailed modeling, I envy people who do. Instead, I get distracted trying to figure out other ways to do stuff like this like.........

Check out this way of automatically created 3D structure from real objects

extremely cool interactive point cloud thing
http://www.openprocessing.org/visuals/?visualID=1995

how to:
http://www.instructables.com/id/Structured-Light-3D-Scanning/

http://createdigitalmotion.com/2009/02/simple-diy-3d-scanning-projector-camera-processing/

http://www.openprocessing.org/visuals/?visualID=1014

master site: bit terse itself but links everywhere else
http://sites.google.com/site/structuredlight/implementations

Wednesday, May 5, 2010

Transform Sequence take 2

This isn't hopefully not my final project One but it's my emergency backup in case my tech problems keep persisting. But, this is in pretty pretty HD so be sure to see it full screen.

Xform from Clay Kent on Vimeo.


My original idea used match moving and mixing in real video quite a bit which technology wise isn't working out so great yet. I've tried Icarus on mac and PC, voodoo on PC, every setting imaginable and soooooooooooo much time but both those programs eventually just crash with no results when there's anything longer than 10 seconds. I'm going to reshoot my video this weekend with no camera movements and without match moving so at least I can turn something in that resembles my original idea. Perhaps use fake camera shaking in after effects or something to simulate it. Anyways, enjoy the work in progress...

Thursday, April 29, 2010

Text Render

Blender text render test from Clay Kent on Vimeo.


This will eventually go into my old project when I get around to rerendering it.

24p fix

For my project I am using live action with blender stuff composted in. I have a Cannon Vixia HV30 High def camcorder that takes great 1080 resolution video. It even does 24p - the option is somewhat buried, but it's in there. Problem is getting 24 p out of a camcorder into anything is a serious PITA. You'd think it would be automatic but not yet. The 24p comes coded out as 60i. Pulldowns and reverse telecine are big long blog entries in their own right (which aren't needed at all in HD digital video but for some reason they are still there) so I won't go into it other than saying that's the stuff you have to undo to get your 24p back. So if you want to get at your 24p video (like to match my blender renders) you need to decode it somehow. After much research I came across a couple ways to do it in compresor and cinema tools, (I think after effects can do it too) but then found much much easier way. Get yourself this freeware program called JES Deinterlacer


---------GET THIS------ http://www.xs4all.nl/~jeschot/home.html ---------GET THIS------


Launch it up, load your movie, select the project box, select reverse telecine and let it do it's thing. And voila, 24p restored. No more weird jaggies and hard to track video.

One more note, In yet another hold over from analog video, quicktime's default display for 1080 lines of resolution is actually 1062 to hide possible analog edge broadcast distortions. (Has 1080 video ever been broadcast in analog? Who made this nonsense a standard?) You don't need it and can get your 1080 back fairly easily. To get rid of this, open the clip in quicktime, cmd-J for the movie property windows thing (or from the windows menu), goto to aperture conform and select 'production' instead of 'clean' and instantly your 1080 lines come back. Save your changed movie and your all done. Then, take it into FCP or wherever and enjoy 24p. Better directions and more info here

You may also have noticed that instead of 1920 columns you have 1440 or something. That is becuase the HDV codec used in the camera uses non-square pixels which when rendered out come out to 1920. Nothing you can do about that. So no true HD yet. (ughhhh I want a red so bad)

Some better written info on all of this here:
http://eugenia.gnomefiles.org/2007/07/13/canon-hv20-24p-pulldown/

Wednesday, April 28, 2010

Project One progress

Very rough transformer sequence. Rendered on a netbook and assembled with windows movie maker......


(sorry for non vimeo video but Its late and I want some sleep and vimeo wont start converting for another half hour and the source quality isn't that great anyway and its a full moon ......)


Monday, April 26, 2010

Project 1 progress: slight hitch


So I was making good progress in Blender when my laptop decided to brick itself. Soooooooooo didn't really get as much done as I would have liked. (although I learned how to take apart a macbook pro) I have access to spare machines but nothing powerful and reliable at the same time. I was able to finish up most non computer stuff like shooting video (thank you nice weather) and recording audio but it looks like I'll be putting in a lot of time in the labs this week.

Lessons learned - next time buy apple care. Always have a spare everything - launching your mac while holding down the T button starts it up as a firewire drive to save your files to another computer (thank god)

Tuesday, April 20, 2010

Project One update

So here's a very rough update on project one so far. It won't make much if any sense yet but here it is:

The concept is 2 transformers (like the toy and the recent movies) meet up and have a short conversation. This piece will mix live action and 3D rendered animation. The render shot sequence (almost a story board except it doesn't make much sense on it's own) is sketched out (see pics below) and the script is ready. I'm recording the dialogue tonight or tomorrow and will record the live action video segments this weekend hopefully. That leaves next week to get a rough render for timing ready and the beginning of the week after that to start the 'real' render. All the while, I'll be working on the real models in Blender which I'll drop in and replace the placeholders in the timing mockup for the final product.


oh yeah - high quality art - I know you're jealous

Thursday, April 8, 2010

Squash and Stretch - Follow Through - Timing - Exaggeration

Got Jello?

Short Little animation practicing some fundamentals of animation:

Jello Delivery from Clay Kent on Vimeo.


I got the truck and VW models from these sites:
http://www.katorlegaz.com/3d_models/index.php
http://www.blendermodels.org/


Some reflections on this project: I got pretty familiar with shape keys with this project but animating lattices is still hit and miss for me. I can tell it's really close to shape keys but different enough to cause some headaches. Specifically, can I have more than one lattice deformation key per lattice? Looks like it should be possible with being able to make more than one key but I had no success and had to create redundant lattices for every different transformation. Also, there seemed to be multiple IPO curves for the key and for basis but they were screwy to work with and seemed redundant but also not connected or functional. In the end I'm not really sure what I did that worked. Probably something simple but I spent quite some time on it and am still confused. All in all I wanted to make something that looked somewhat polished and not too 1/2 assed. Time wise that was tough but hopefully I've learned a bit to make next time faster.

Second thing I learned: Final Cut Pro is weird with alpha channels. Using the animation codec with keyframe for every frame selected, max quality on everything and no video channels muted out and a pre-roll image of 5 or so frames before any important action finally seemed to give not jittery (perfect copy) playback with functional alpha channel for every frame not to mention huge video files. Definitely buggy, but at least I found something that works. The AE cs5 demo comes out in a couple days I think. I'll download that and see if it's more friendly.

Sunday, April 4, 2010

Array Animation Final(ish)

Animating with Arrays in Blender from Clay Kent on Vimeo.


I ended up turning off ray-tracing for rendering and I really like the way it came out. It's rendered out with alpha channels so it could be further tweaked in motion or AE (but my AE trial is downloading so I can't try that now)

Array Animation So far....

This is really horrible, I don't know why I'm posting it other than it might make the final version which itself might not be that great look way better in comparison. This version is wire frame only just to check the timing and not use too much render time. (which as it turns out the timing is complete crap) Definitely worth it checking your rendered work in progress for flow and feel before you but too much time into something fundamentally clown shoes. (Extra Bonus points if you can tell what's on TV in the background while I'm working, Anyone actually still read this far? ) Anyways,I'll probably I'll erase it all, start over by mapping it out in my mind, sit down with my stopwatch to get the better timing results and redo it........So grab some popcorn, but just 20 seconds worth and enjoy:


Really Bad Blender Array Animation from Clay Kent on Vimeo.

Thursday, April 1, 2010

Best Theme Park Ride Ever

This is so cool. I highly recommend you ride it......

(view Full res)

Darwinator (Theme Park Ride in Blender) from Clay Kent on Vimeo.


Someday I'll finish re-rendering this with various tweaks fixes and HD res etc but I wanted to make this public in case that takes a while

Class Collaborative Project

Collaborative Project (roughish) from Clay Kent on Vimeo.


Here's my part

Tuesday, March 9, 2010

Random Blender fun..

Tuesday, February 23, 2010

Final Project Ideas

Here are my 5 initial ideas for my final 3D project

-unfinished narrative: abstract art using 3d engine. continuation of line/dot movie (entire video made from just lines and dots) made for interactive video/audio class (original not online)

-unfinished narrative - A lifetime to re-render (video ARTD251 final project)- last scene should be full blown 3d with explosions and matrix like effects

-Product Invention: kinetic energy/self powered Rube-Goldberg Swiss watch looking johnny on the spot/porto-san

-Product Invention Swiss army food condiment dispenser salt/pepper/catsup/relish/mayonnaise (real looking but cartoonish proportionally in size of attachments related to handle)

-product invention amusement park ride - The Vominatrix - the most ridiculous/dangerous/unnecessary/unstable barely held together /ridiculous amusement type thrill ride. Presented as a promotional poster or technical diagram cobination

Sunday, February 21, 2010

Feline Follies in 3D

Vimeo:

Feline Follies in 3D from Clay Kent on Vimeo.


Same thing on You tube just in case:


(Final Project Turn In )

In this Feline Follies cartoon Master Tom (later to be renamed Felix the Cat) is introduced. This was an very early example of the craft and style that would eventually develop into the cartoons we know and love. Since the copyright is up and I can use this footage copyright free (I believe this cartoon dates to 1919) I decided to take a couple of scenes and not only render the 3D equivalents but to display it in anaglyph (red/cyan) 3d. I'm pretty happy with the result. Some of it works better than the rest but overall I think this is a success and a good homage to the origins of modern cartoons. (OK the 40,50,and 60s cartoons) I'll definitely be playing with this more at some point.

Some specifics: 3d scenes created in blender using the orginal cartoon footage plastered on as the texture (primarily using uv projection) - Also Motion for stabilization and keying and Final Cut pro for editing. The files for this exist as seperate left and right renders to create a more modern 3D rendering with circular polarization or some other rendering scheme someday but anaglyph is a fun throw back to old technology and probably the best way to present 3d to the most people through the internet.

Download the H264 version (40meg)

Wednesday, February 17, 2010

Coming Soon.....


Project 1 - Felix the cat in 3d:

Here is a still from a (hopefully) 3d version of Felix the Cat. For my big project (first one) I'm going to transform a couple of the scenes into 3d

Tuesday, February 16, 2010

My kitchen went on vacation and all I got was this lousy movie

This probably isn't art - just fun

(this worked earlier - I have no idea why it's busted now. If it's still busted later I'll get a vimeo account or something)

So in my "I can't concentrate because of my cold" induced state I got massively distracted by UV mapping. After watching a couple of youtube videos:

http://www.youtube.com/watch?v=ToMpcXGf0-c

and

http://www.youtube.com/watch?v=vbvex7maHL8&feature=related

I decided to see if I could put this cell phone pic of my fridge:

on the beach. Blender has a very cool UV map generator from the camera's perspective which essentially allows you to slap an image on whatever your looking at and it automagically matches whatever objects the blender camera is looking at (and is selected for editing) meaning that if you make the objects, position the blender camera in the same position as your source photo, unwrap (u) using 'project from view (bounds)' and tweak to make it look right you can create 3d virtual reality worlds from your own photos. Anyways, I animated my fridge sliding across the beach [movie at top] to show how this works:

I added movement and camera angle change to show the 3d qualities of the fridge and counter slide across the beach to prove this isn't a very lame quick photoshop hack. So this photo and object line up creating some realism but if your photo doesn't match your blender world it would just be bizarre surreal and potentially extremely cool which would initally line up and look cool but distort heavily as you move things or the camera around. Sounds too cool not to try that next.

There's also a modifier called UV projection that does something really cool kinda similar too but I havn't figured out how to use it yet.

Monday, February 15, 2010

Felix starting to take form. Kinda frightening looking right now. Like he has digital rabies or something

Sunday, February 14, 2010


Working on a Felix the Cat in Blender. Here's the cool looking wireframe version that makes it look cooler and more sci-fi impressive than it actually is so far

Thursday, January 21, 2010

Dreams of the Monkey God

Snail Sponsorship


This could use a bit of fine tuning but mostly I wanted to play with plastering nascar style corporate sponsorship logos all over the snail shell.

Monday, January 18, 2010


Balls and Squares............................in space!

Tuesday, January 12, 2010

Broken wine bottle - still needs spill to look like liquid and wine glass to look transparent (and better lighting etc)

Thursday, January 7, 2010

Wednesday, January 6, 2010

Sparkfun.com free day Thursday

If you know what sparkfun.com sells you don't want to miss their 100$ of free stuff day. Starts this Thursday at 8am.

Tuesday, January 5, 2010

My First 3D randomness


Some profound text goes here.